
Hello everyone, I recently took a webinar on “Understanding Azure AD application”. Thanks to Pune User Group for organizing the webinar and helping me to share my knowledge with the community. I decided to write a blog about the same for anyone who wants to revisit this topic.
So, what are we going to learn from the rest of the article?
I am going to divide this post in 2 parts.
Part 1 – We are going to explore: –
What is an Azure AD application?
How are the service principal and an application object related to each other?
What are the different types of permission available? And how do they differ from each other?
Part 2 – We are going to explore: –
How you can authenticate a user using AD application? How OAuth2.0 plays a role here.
How permission and consent that we set works here?
How you can access delegated permission without making the user login every time?
Let’s start with the topic.
What is an Azure AD application?
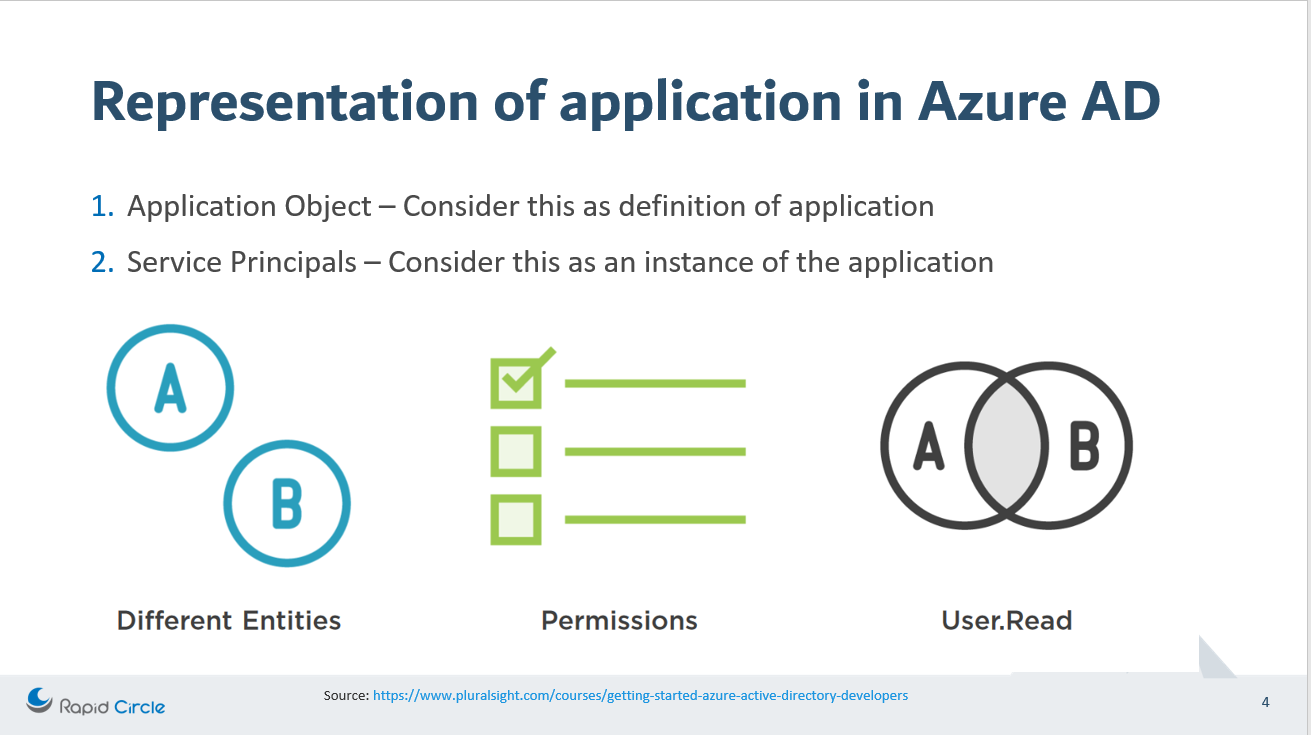
There are a lot of different definitions available for the AD application. But I like to consider the understanding in this way – AD application is like a broker that will help in performing the authentication with Microsoft services, this application will be a trusted app which Microsoft can validate. Now saying this, I want you to understand whenever we talk about AD application then there are two representation of it: –
- Application Objects
- Service Principal
Application objects can be considered as the definition of an application, or you may consider this as a schema of the application. Whereas, the service principal can be considered as an instance of an application. Service Principal generally refers to an application object.
There is a very good article by Microsoft (https://docs.microsoft.com/en-us/azure/active-directory/develop/active-directory-how-applications-are-added) which explain this. I will try to explain that in simple terms in the next few sections.
Application Object
The application object is created as soon as you create an AD application. Only one application object at max can be created per application. The properties that you define to the application as if it is a single-tenant or multi-tenant application, or name of the application, redirect URIs and may other properties. Point to remember that an application object will only be present in its home directory. You might be having a question as to why are we mentioning about an application object presence in the home directory? Because we are going to see in the next few minutes that the service principal can exist in another tenant as well.
Service Principal
The service principal can be considered as the instance of the application. This instance can be present in our home directory as well as in another directory. The service principal connects to the application object, hence it has a reference back to the original application via the application Id.
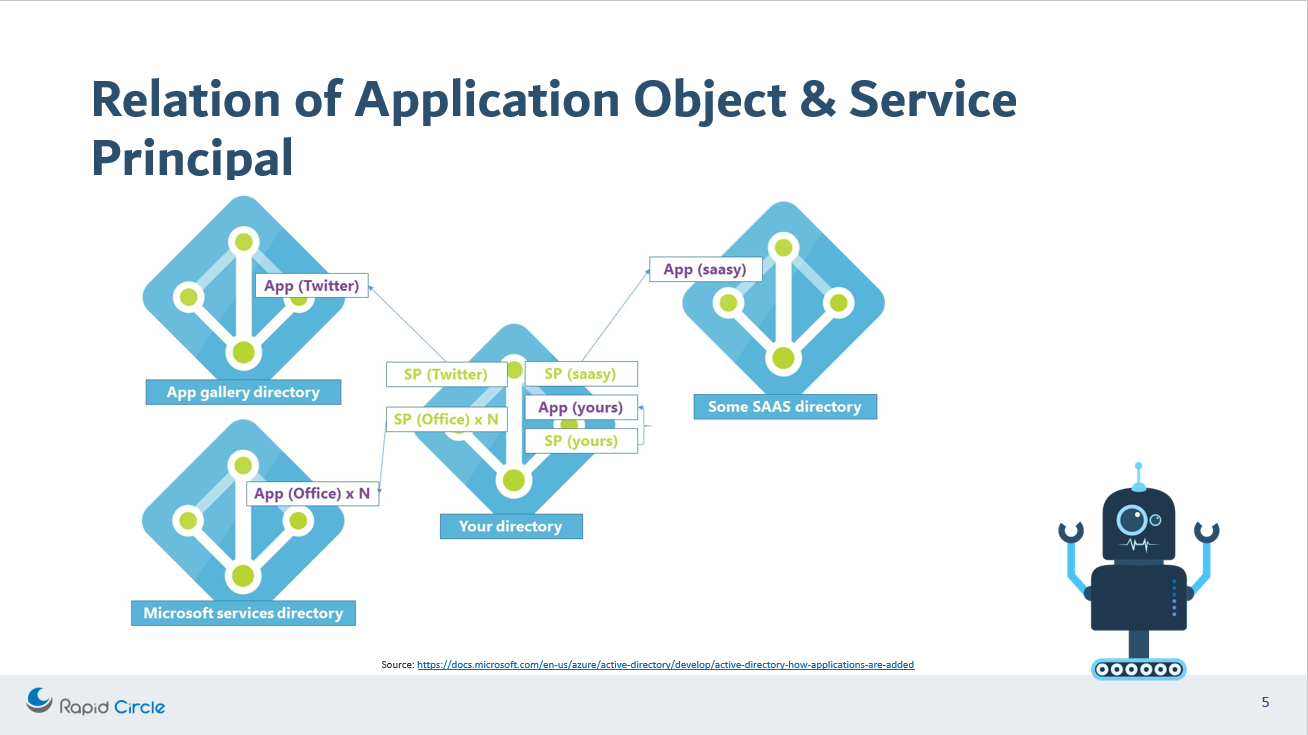
Since we understand about application object and Service Principal, let’s reiterate on the topic as how are they connected.
To make it simple, understand this concept that there is only one application object which is present at home directory which is referenced by one or more service principal present at home directory as well as other directories.
If you want to see this service principal in your directory which is connected to the application object present in the source directory then visit the Enterprise application in the Azure portal active directory section. The enterprise application that you will see here are the service principals of the applications which are present in some other directory.
Different types of permission available for an AD application
When we create an AD application then by default “User.Read” permission is added for the application. This results in auto-creation of the service principal.
There are two types of permissions available:-
- Delegated Permission – Use this permission when you want to call the web API as the logged-in user. This type of permission will never have more access than the access of the logged-in user.
- Application Permission – Use this permission when you want your application to call the API itself without the need of the logged-in user. This type of permission can have more level of access than the logged-in user. This type of permission requires administrator consent.
If you want to see this in action then go to your registered app – https://portal.azure.com/#blade/Microsoft_AAD_IAM/ActiveDirectoryMenuBlade/RegisteredApps and open the application which you have created. If you have not created any application then you can create an application by following these steps – https://docs.microsoft.com/en-us/azure/active-directory/develop/quickstart-register-app#configure-a-client-application-to-access-web-apis
Once you have opened your application then click on API Permission—> Add permission —> select API —> select type of permission here
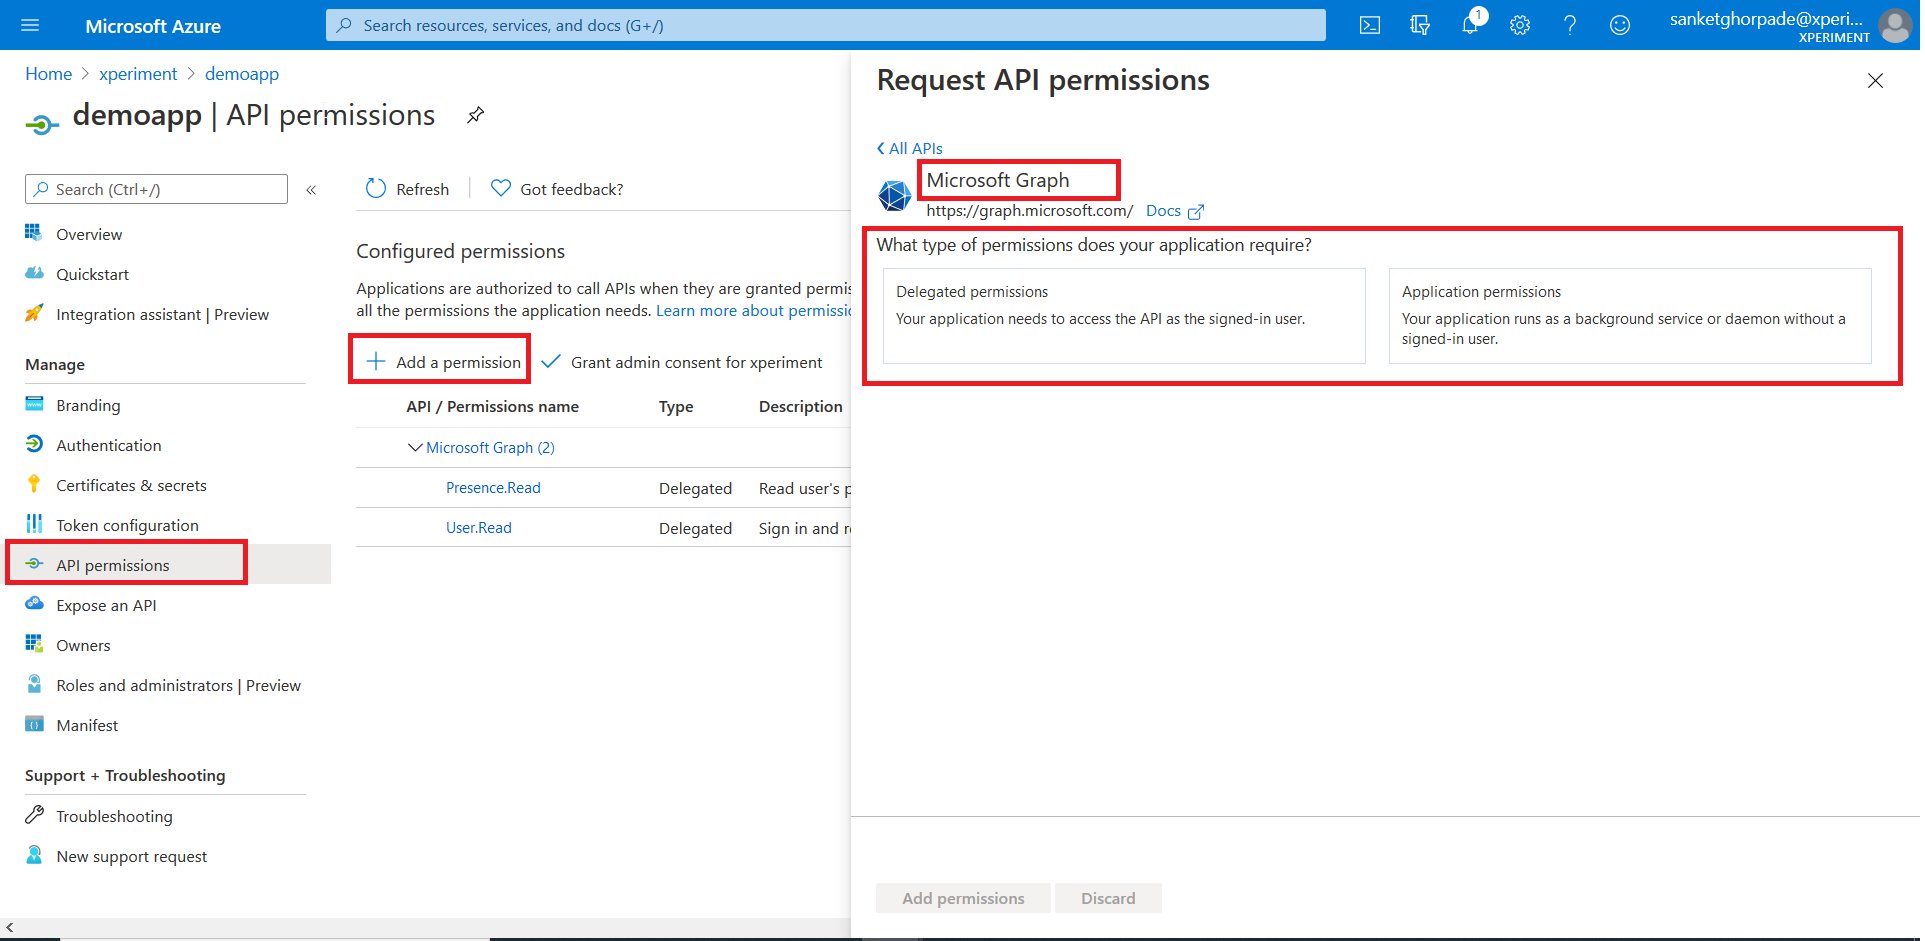
Explore this area to see which permissions are present in each type of permissions.
Thank you for reading until the end of the first part of the article. I will be writing the 2nd part of this article which will explain how you can authenticate a user using AD application and how permission and consent plays a role here. We will also be exploring how a delegated permission can be accessed without the need of the logged-in user.
Meanwhile, please let me know in comments about any question or your feedback on this post.
Have an amazing day! Stay fit, keep learning and keep sharing 🙂

Leave a comment